 Pin it
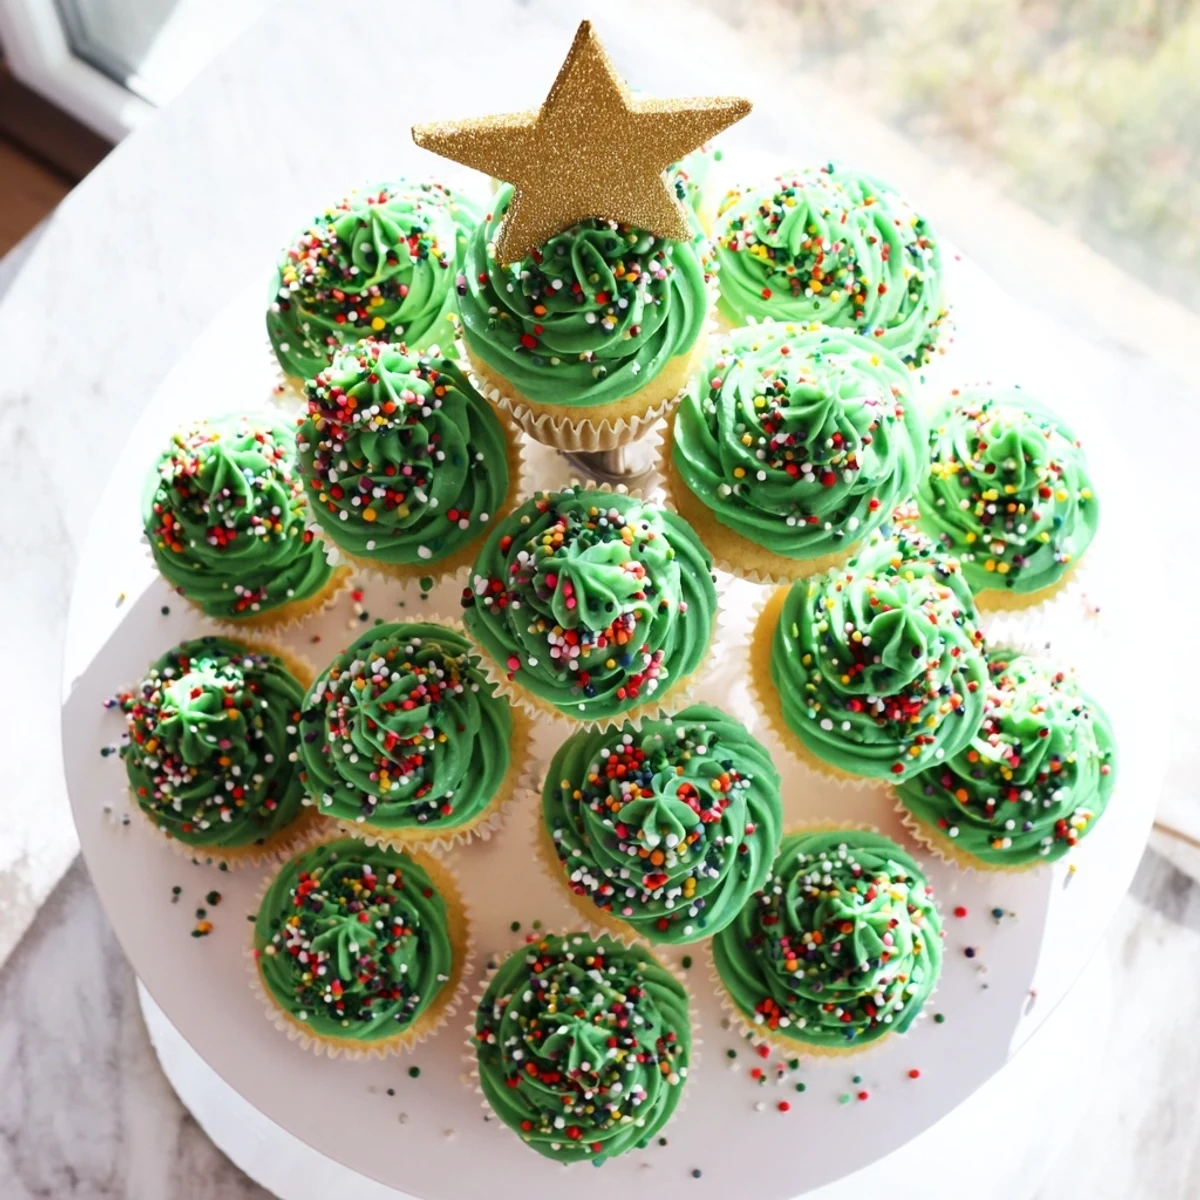
 Build a showstopping holiday centerpiece by arranging vanilla cupcakes in a triangular tree formation, topped with vibrant green buttercream frosting and playful decorations. This impressive display brings festive cheer to any gathering while offering delicious homemade treats guests can easily enjoy.
The process starts with classic vanilla cupcakes baked until golden, then crowned with swirls of tinted buttercream using a star tip for that evergreen texture. Arrange your collection beginning with seven cupcakes at the base, stacking upward in decreasing rows to form the perfect tree shape. Finish with edible ornaments, a golden star topper, and optional coconut snow for extra winter magic.
Last December, my neighbor hosted an ugly sweater party and everyone was supposed to bring a dessert. I showed up with a regular plate of cupcakes, feeling pretty proud until I walked into her kitchen and saw this magnificent tree-shaped tower rising from the counter like something out of a magazine. She told me it took her forty minutes to assemble and I was standing there calculating how late I could stay to help her eat it.
My daughter helped me make our first tree last year and she took her job as sprinkle distributor very seriously. She arranged the ornaments by color and insisted the red ones went on the left side because and I quote thats where Santa would want them. The tree ended up looking slightly lopsided but nobody cared because we had so much fun building it together.
Ingredients
- All-purpose flour: The foundation that gives these cupcakes their tender crumb, and sifting it first prevents any lumpy surprises
- Baking powder and baking soda: Both work together to create that perfect dome shape, so dont skip either one
- Unsalted butter: Room temperature butter is nonnegotiable here because it needs to grab onto those sugar molecules for proper aeration
- Granulated sugar: Sweetens and tenderizes the crumb while helping create that beautiful golden top
- Large eggs: Room temperature eggs emulsify better with the butter, creating a more uniform texture
- Whole milk: Adds moisture and richness, and I promise the fat content makes a noticeable difference in the final cupcake
- Powdered sugar: Sifting might feel tedious but it saves you from those tiny sweet lumps in your buttercream
- Green gel food coloring: Gel is more concentrated than liquid, so you get that vibrant Christmas tree green without thinning out your frosting
Instructions
- Get your oven ready:
- Preheat to 350°F and line those muffin pans with festive liners because every little bit of holiday cheer counts
- Whisk the dry team:
- Combine flour, baking powder, baking soda, and salt in a bowl, then set it aside while you tackle the butter
- Cream butter and sugar:
- Beat them until theyre pale and fluffy, which takes about 3 minutes of patience but makes all the difference in texture
- Add the eggs and vanilla:
- Beat in eggs one at a time, letting each one fully incorporate before adding the next, then stir in the vanilla
- Combine wet and dry:
- Add flour mixture in three parts, alternating with milk, and stop mixing the second you see the last streak of flour disappear
- Bake them up:
- Fill liners about two-thirds full and bake for 18 to 20 minutes, until a toothpick comes out clean and they smell like heaven
- Make the buttercream:
- Beat butter until creamy, gradually add sifted powdered sugar, then mix in vanilla and milk until you reach spreadable consistency
- Color it green:
- Add gel food coloring one drop at a time because its incredibly potent and you can always add more but you cant take it back
- Pipe those trees:
- Use a large star tip to pipe tall swirls on each completely cooled cupcake, starting from the outside and working inward
- Build your tree:
- Arrange cupcakes on your serving board in rows of 7, 6, 5, 4, 2, and 1 to form that classic Christmas tree triangle
- Add the magic touches:
- Scatter sprinkles like ornaments, crown the top cupcake with your gold star, and step back to admire your masterpiece
 Pin it
 The first time I attempted this tree, I arranged the cupcakes on a regular dinner plate and ran out of space halfway through. My husband walked in, saw the halfassembled disaster on my counter, and immediately ran to the garage for a piece of plywood. We wrapped it in foil and suddenly my tree had the grand canvas it deserved.
Building A Stable Foundation
You need a large cutting board, serving platter, or even a piece of foam core wrapped in festive paper. The base row of seven cupcakes needs about 16 inches of width, and nobody wants their masterpiece tipping over because of real estate issues.
Frosting Like A Pro
Practice your piping technique on a plate before committing to the actual cupcakes. The tall swirls look impressive but they require steady pressure and a confident hand, so take a few test spins to find your rhythm.
Make It Your Own
Swap vanilla cupcakes for chocolate or red velvet, use different colored sprinkles to match your party theme, or add coconut snow around the base of your tree for extra winter magic.
- White buttercream with silver sprinkles creates an elegant frosty tree look
- Chocolate cupcakes with green frosting add a nice depth of flavor
- Mini cupcakes work for a smaller tabletop version if 24 feels overwhelming
 Pin it
 Every time I bring this tree to a gathering now, someone inevitably asks how long it took to make. I smile and say maybe an hour, but watching faces light up when they walk into the room is worth every minute.
Recipe FAQs
- → How do I arrange cupcakes into a tree shape?
-
Start with 7 cupcakes at the base, then place 6 above them, followed by 5, then 4. Finish with 2 cupcakes and place the final cupcake at the very top. This creates a classic triangular tree silhouette on your serving board.
- → Can I make these cupcakes ahead of time?
-
Bake cupcakes up to 2 days in advance and store in an airtight container. Prepare buttercream ahead and refrigerate, then bring to room temperature and re-whip before piping. Assemble the tree shortly before serving for best presentation.
- → What piping tip works best for the tree effect?
-
A large open star tip creates beautiful textured swirls that mimic evergreen branches. The ridges in the frosting give the appearance of pine needles while holding decorations securely in place on each cupcake.
- → How do I transport the cupcake tree safely?
-
For easy transport, arrange cupcakes on a sturdy cutting board or cake board with raised edges. Consider using a foam cone as support and attaching cupcakes with toothpicks for a more stable structure that won't shift during travel.
- → What other decorations can I use?
-
Multicolored sprinkles make perfect ornaments, while shredded coconut creates a lovely snow effect when sprinkled over the green frosting. Mini candy canes, edible pearls, red hots, or even small chocolate kisses add variety and extra holiday charm.
- → Can I use cake mix instead of from scratch?
-
Boxed cake mix works perfectly for this project—the visual impact comes from the arrangement and decorating. Focus your efforts on creating lush buttercream and creative decorations for a stunning result that saves baking time.
