 Pin it
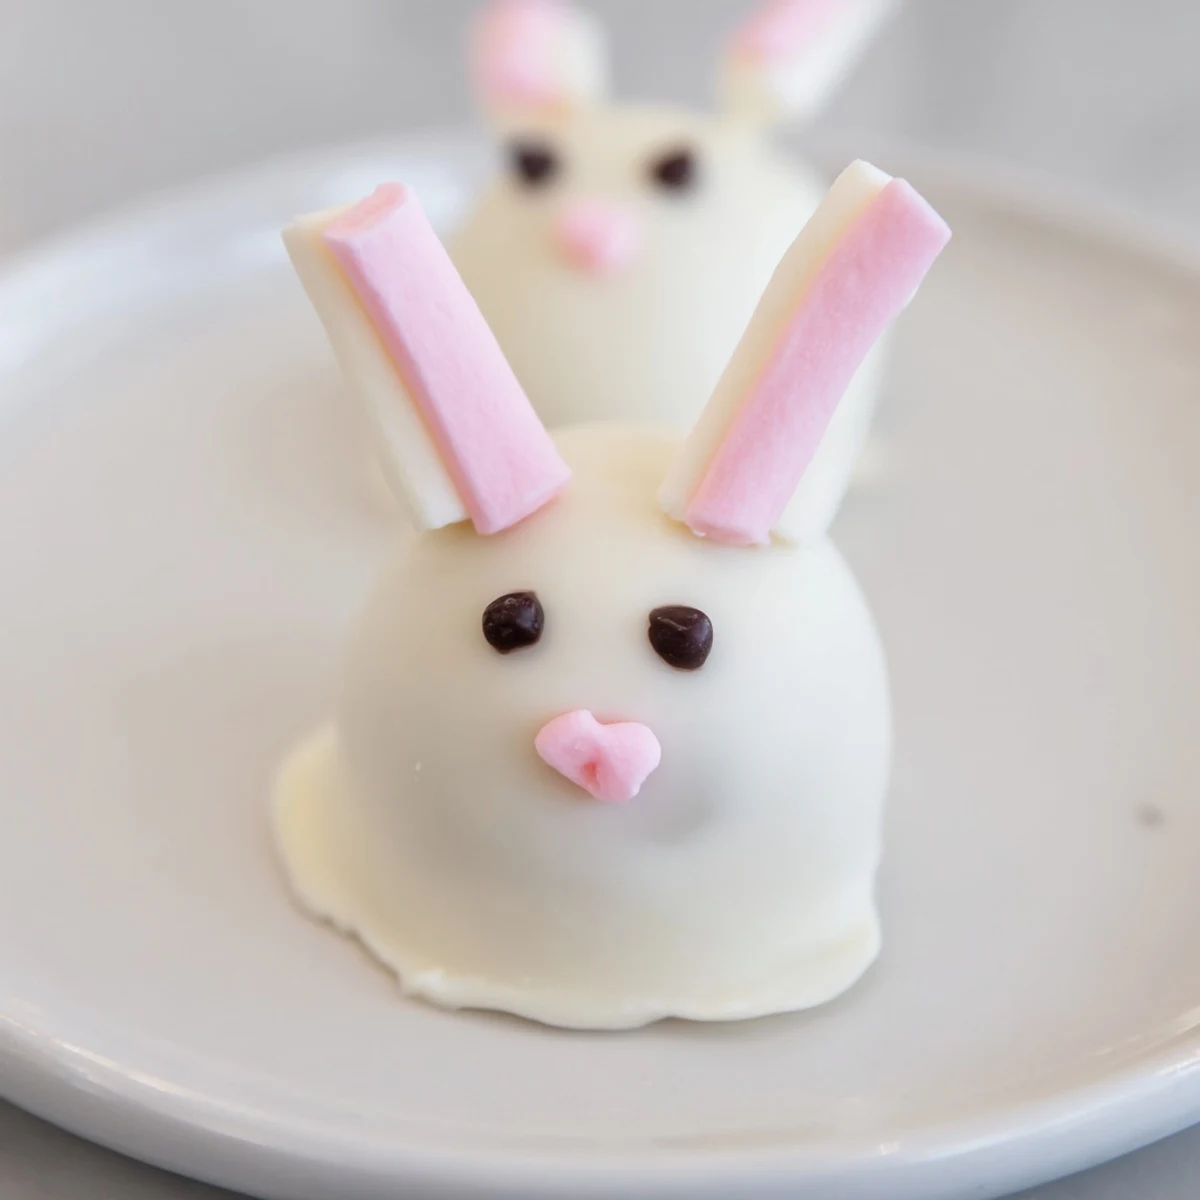
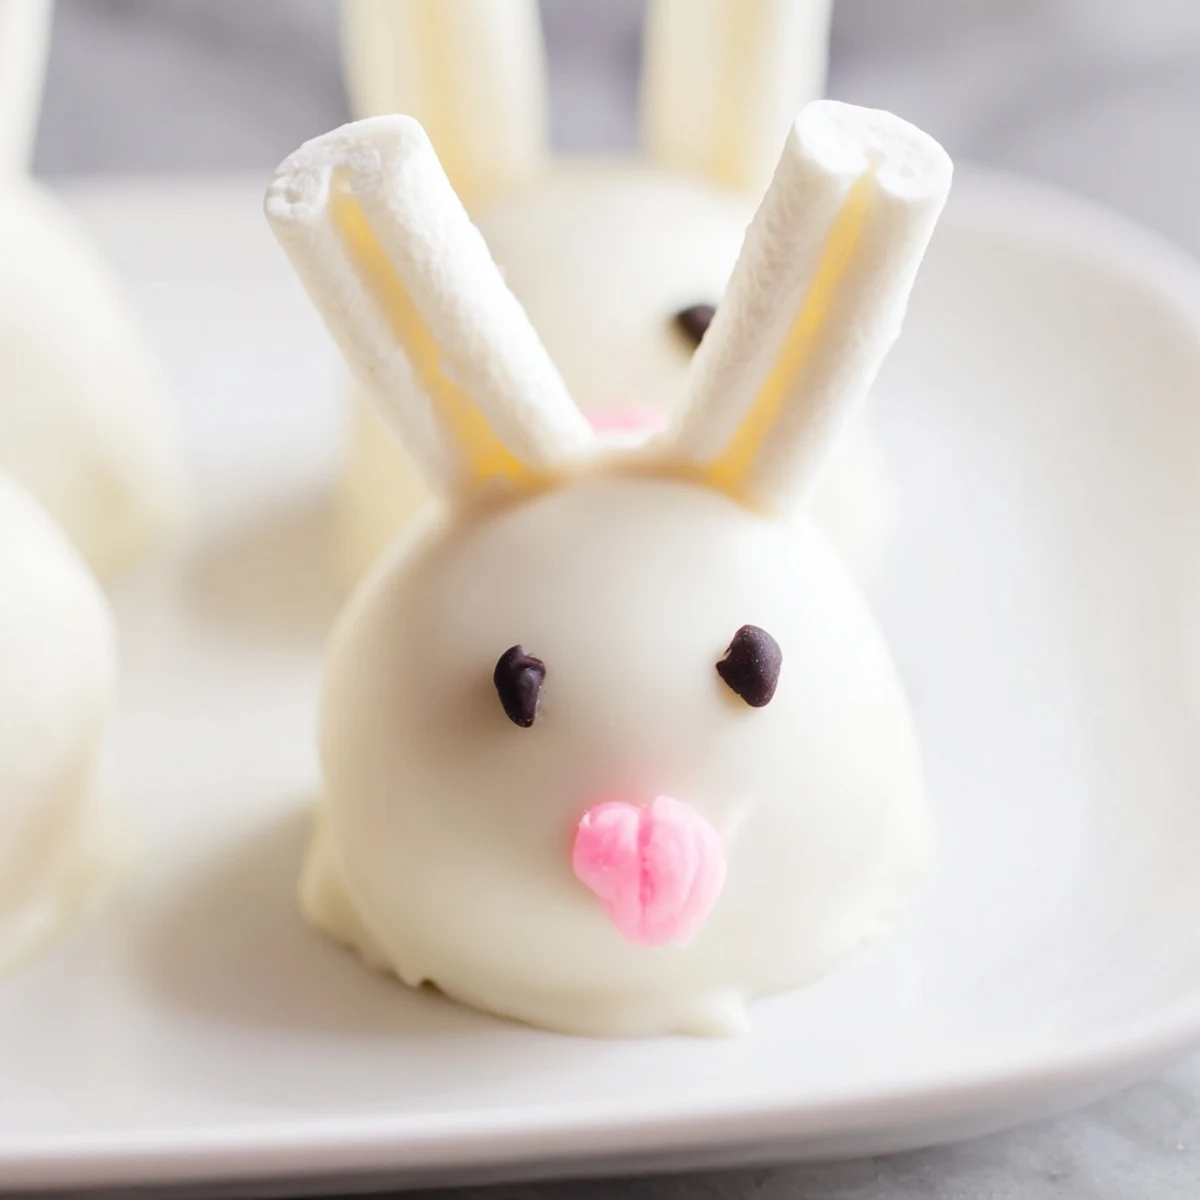
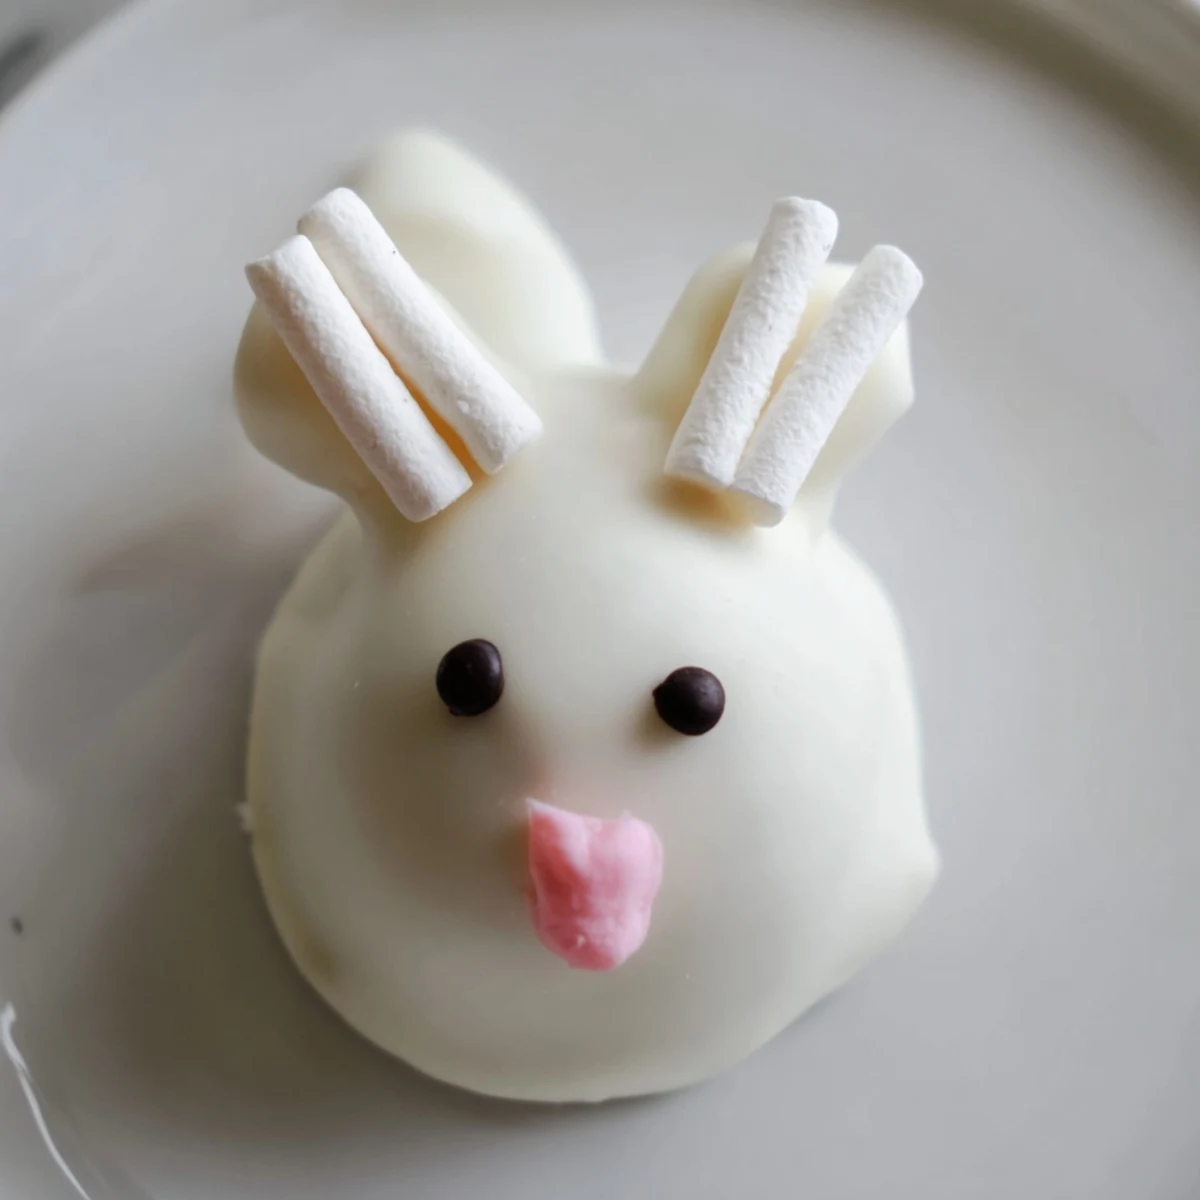
 These delightful bunny-shaped treats combine crushed Oreo cookies with cream cheese, coated in smooth white chocolate and decorated with marshmallow ears and tails. The process involves pulsing cookies into fine crumbs, blending with softened cream cheese to form a dough, then shaping into oval bunny heads. After freezing briefly, dip each ball in melted white chocolate and attach marshmallow details while wet. Complete the faces with pink candy melt noses and black food marker eyes. Chill until set before serving.
Last Easter, my youngest looked at the store-bought treats and asked if we could make something that felt more like us. That afternoon, we found ourselves covered in chocolate and marshmallow bits, creating these silly little bunny truffles that somehow became the highlight of the holiday. Now they are the first request when spring starts showing up on the calendar.
I learned the hard way that working quickly once the chocolate melts matters immensely. The first batch ended up with marshmallows sliding off because the coating had already set. But that mistake taught me to have everything prepped and ready before the dipping begins.
Ingredients
- 36 Oreo cookies: Regular Oreos work best here, Double Stuf makes the filling too soft to hold its shape
- 225 g (8 oz) cream cheese: Must be softened to room temperature or you will end up with lumpy chunks that refuse to blend smoothly
- 400 g (14 oz) white chocolate or white candy melts: Candy melts are easier for beginners since they set faster and stay glossy
- Pink candy melts or pink food coloring: This adds the adorable nose and inner ear detail that makes them recognizable
- Mini marshmallows: Cut them in half for tails and into thin slivers for ears, they stick best when the chocolate is still wet
- Edible black food marker: Wait until everything is completely set before drawing eyes or the ink will smudge into the chocolate
- Sprinkles or colored sugar: Optional, but a little sparkle never hurt anyone
Instructions
- Make the crumb mixture:
- Pulse the Oreos in a food processor until they become fine, uniform crumbs. Add the softened cream cheese and blend until it comes together like a thick dough.
- Shape the bunnies:
- Scoop about one tablespoon of mixture and roll into balls, then gently shape each into a slight oval. Place them on a parchment-lined baking sheet and freeze for 30 minutes so they hold their shape when dipped.
- Prep your decorations:
- Cut mini marshmallows in half for tails and slice some into thin slivers for ears. Have everything arranged and ready on a plate nearby before you melt the chocolate.
- Coat the bunnies:
- Melt the white chocolate in 30-second intervals, stirring until smooth. Dip each frozen ball completely, let excess drip off, and return to the parchment paper. Immediately press two marshmallow slivers on top for ears and one half-marshmallow on the back for the tail.
- Add the faces:
- Once the chocolate has set for about 10 minutes, use a toothpick dipped in pink coating to draw noses and fill the ears. Let that dry completely before using the black marker for eyes.
 Pin it
 My sister now makes these every year for her classroom Easter party. She told me the kids get more excited about the bunny faces than any chocolate bunny they have ever received.
Making Them Ahead
You can form and freeze the uncoated balls for up to a week before dipping. Just thaw them slightly before coating so the chocolate does not seize from the cold temperature.
Chocolate Troubleshooting
If your white chocolate seems too thick, add a teaspoon of coconut oil or vegetable shortening to thin it out. This makes coating smoother and gives you a little more working time before it sets.
Flavor Variations
Try crushing pretzels into the Oreo mixture for a salty crunch that cuts through all the sweetness. You could also use milk or dark chocolate instead of white coating for a different look.
- Add a drop of almond extract to the filling for a subtle nutty flavor
- Use Golden Oreos instead of regular for a vanilla-forward taste
- Roll the finished balls in edible glitter for extra sparkle
 Pin it
 These little bunnies bring so much joy to the table and disappear faster than you can imagine.
Recipe FAQs
- → How long do bunny Oreo balls keep fresh?
-
Store in an airtight container in the refrigerator for up to 5 days. The cold temperature keeps the chocolate coating firm and the filling fresh.
- → Can I use Double Stuf Oreos instead of regular?
-
Regular Oreos work best as they provide the right cookie-to-cream ratio. Double Stuf may make the mixture too soft and difficult to shape properly.
- → What other chocolates work for coating?
-
White candy melts provide the smoothest coating, but white chocolate chips melted with a teaspoon of coconut oil work well too. For variety, try dark or milk chocolate coating.
- → Why freeze the balls before dipping?
-
Freezing for 30 minutes firms up the mixture, making it easier to handle when dipping in warm chocolate. Cold balls also help the coating set faster and prevents the filling from melting.
- → Can I make these ahead of time?
-
Prepare these up to 2 days in advance and store refrigerated. The marshmallow decorations stay fresh, and the chocolate coating protects the Oreo filling. Bring to room temperature 15 minutes before serving.
