 Pin it
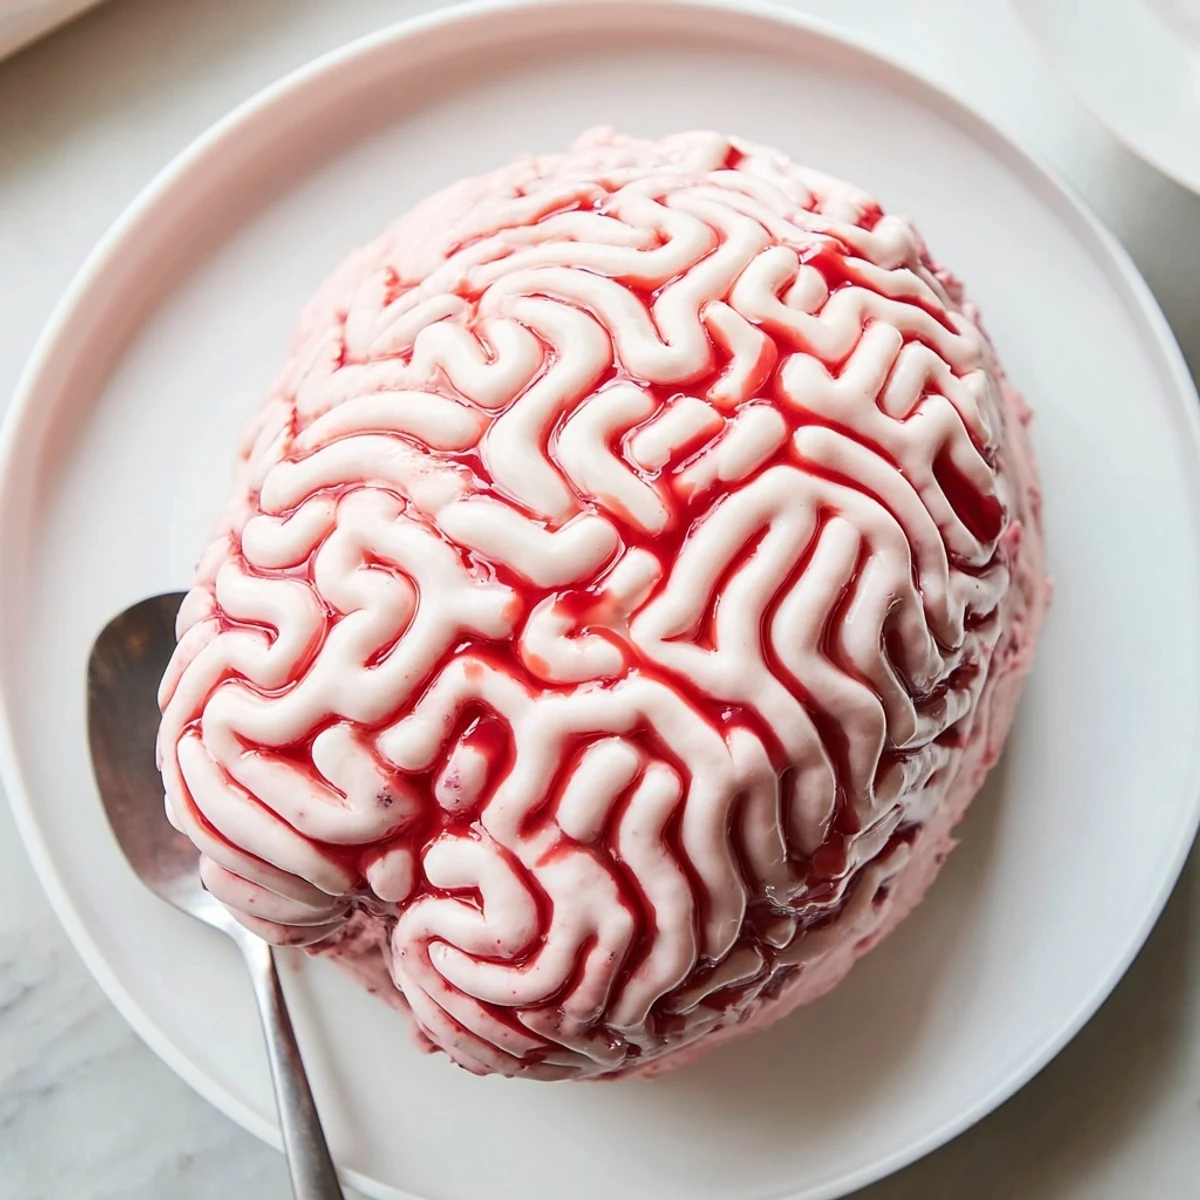
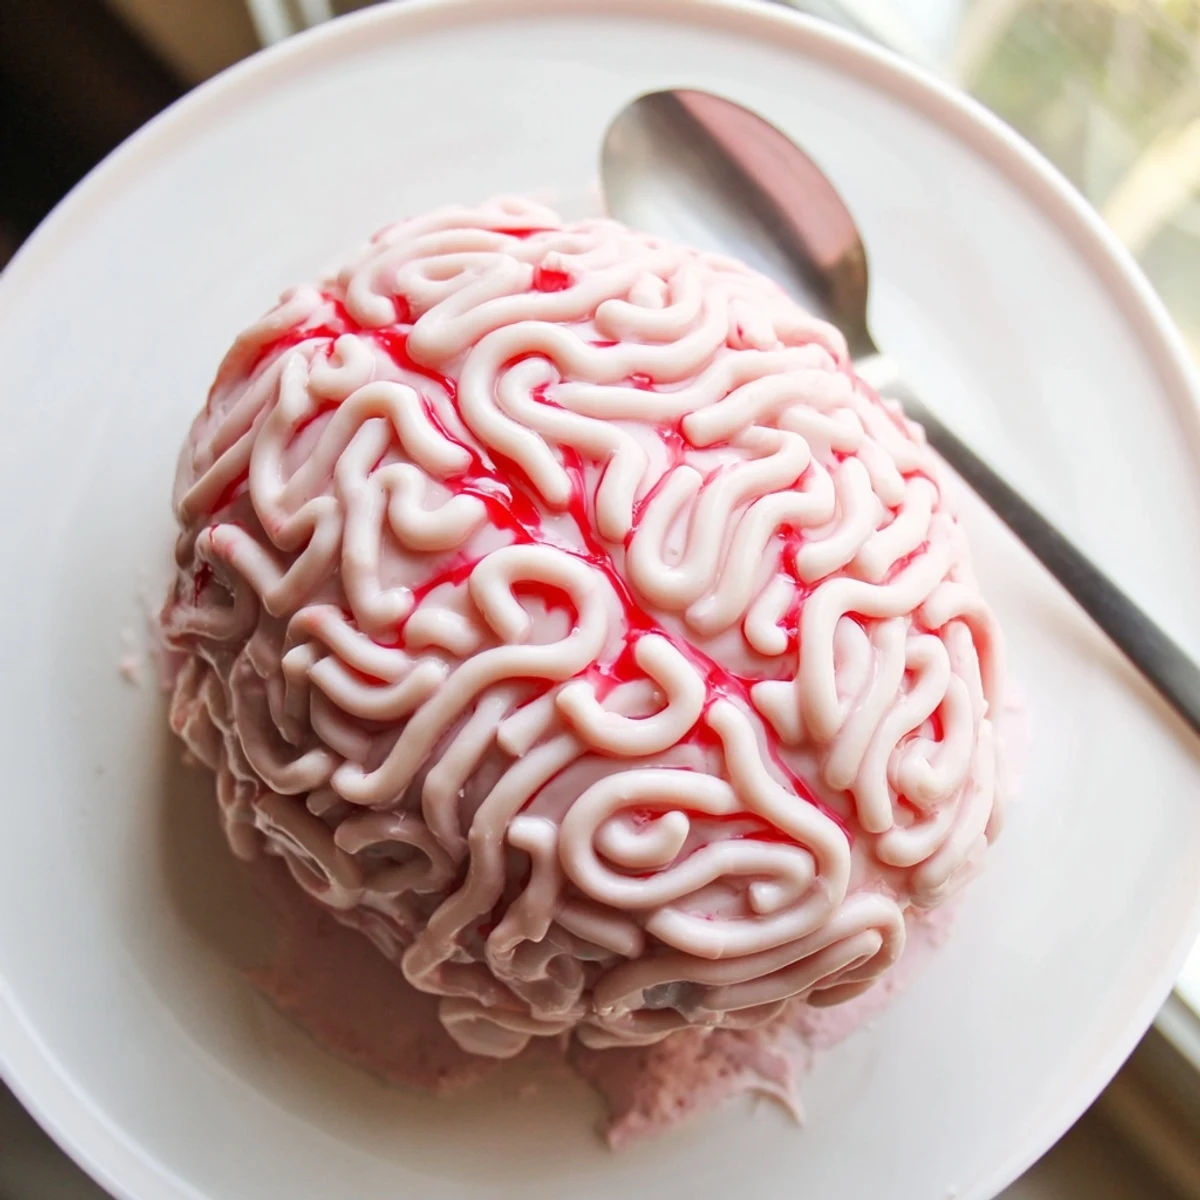
 This haunting dessert combines creamy cheesecake with fresh strawberry flavor in a brain-shaped mold. The graham cracker crust provides a crunchy base, while the strawberry-infused filling gets its vibrant color from fresh berries. White chocolate piped into squiggly patterns creates realistic brain folds, perfect for Halloween celebrations or themed gatherings.
The no-bake method makes preparation simple—just blend, combine, chill, and decorate. Each slice delivers rich creaminess balanced by bright strawberry notes and buttery cookie crunch.
Last Halloween, my kitchen looked like a crime scene. I had strawberry puree everywhere, white chocolate dripped across the counter, and this brilliant pink brain sitting in the refrigerator. My roommate walked in, froze, and asked if I was okay. The look on her face when I offered her a slice was absolutely worth the mess.
I brought this to a potluck and watched three grown adults hesitate before finally trying it. Within minutes, the plate was empty and people were asking for the recipe. Theres something deeply satisfying about serving a dessert that makes people giggle nervously between bites of creamy, strawberry perfection.
Ingredients
- Graham crackers or digestive biscuits: The crust needs to be finely crushed so it presses evenly into the brain mold and holds everything together
- Unsalted butter, melted: Room temperature butter blends better with the crumbs for that perfect press-in texture
- Fresh strawberries, hulled: Really ripe strawberries give you the best flavor and that gorgeous pink hue
- Gelatin powder: This sets the strawberry layer and gives the cheesecake its structure without baking
- Cream cheese, room temperature: Cold cream cheese creates lumps, so let it sit out for at least an hour
- Powdered sugar: Dissolves more smoothly than granulated sugar in the cream cheese mixture
- Heavy cream: Whip this separately to soft peaks for the lightest, airiest filling
- White chocolate: Use high-quality white chocolate for the brain squiggles, it pipes better and tastes less waxy
Instructions
- Prep your mold:
- Line a brain-shaped silicone mold with plastic wrap, or use an oval bowl lined with plastic wrap for easy removal later
- Make the crust:
- Crush the graham crackers until theyre like fine sand, mix with melted butter, press firmly into the bottom of your mold, and refrigerate while you work on the filling
- Prepare the strawberry layer:
- Blend strawberries with sugar until completely smooth, bloom the gelatin in warm water, dissolve it fully, then stir it into the strawberry puree and let it cool to room temperature
- Whip the cream cheese base:
- Beat cream cheese and powdered sugar until silky smooth, whip the heavy cream separately to soft peaks, fold them together with vanilla, then gently fold in the cooled strawberry gelatin mixture
- Assemble and chill:
- Pour the filling over your prepared crust, smooth the top, and refrigerate for at least 5 hours until completely set
- Decorate like a pro:
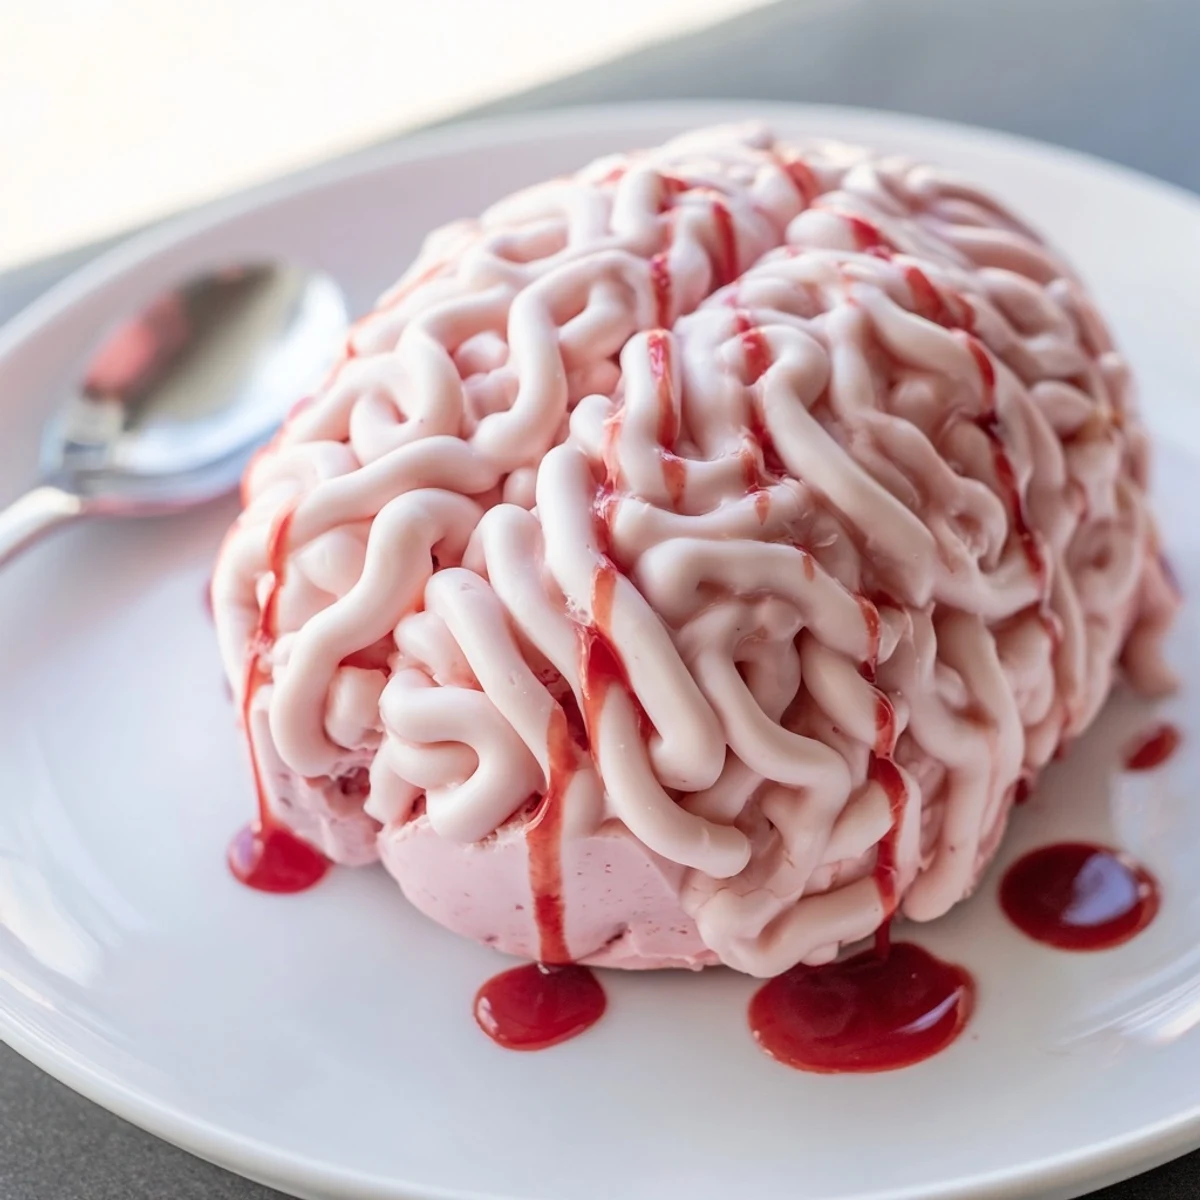
- Melt white chocolate, tint with pink food coloring if you like, pipe squiggly brain folds onto parchment paper, chill until firm, then carefully place them on your unmolded cheesecake and drizzle with strawberry sauce for that gruesome final touch
 Pin it
 I made this for my nephews birthday and he took photos before cutting into it. The whole family crowded around, phones out, as I carefully placed the white chocolate brain folds. It became the most Instagrammed dessert at the party, but honestly, the second slice was even better than the first photo.
Getting The Brain Texture Right
The key to realistic brain folds is piping the white chocolate while its still warm but not hot. Too hot and it spreads into puddles, too cool and it breaks when you try to transfer it. I usually do a few test squiggles on extra parchment to check the consistency before committing to the final decoration.
Making It Ahead
This cheesecake actually improves after a night in the refrigerator. The flavors meld together and the texture becomes even creamier. You can make the entire thing up to 2 days before serving, just add the white chocolate decoration the same day you plan to serve it for the freshest look.
Serving And Storage Tips
Let the cheesecake sit at room temperature for about 10 minutes before serving for the creamiest texture. Any leftovers can be covered and refrigerated for up to 4 days, though I have never had this last more than 24 hours in my house.
- Use a hot knife to get clean slices that show off the pretty pink layers
- Extra strawberry sauce on the side lets guests add their own gory drip effect
- The brain decoration can be made days ahead and stored between parchment paper in the freezer
 Pin it
 This might be the most fun dessert I have ever made, and the fact that it actually tastes as good as it looks is just the cherry on top. Your guests will be talking about this one for years.
Recipe FAQs
- → How long does the brain cheesecake need to chill?
-
The cheesecake requires at least 5 hours of chilling time to fully set. For best results, prepare it the night before your event to ensure it's firm enough to unmold and decorate cleanly.
- → Can I make this without a brain-shaped mold?
-
Yes! Use a medium oval bowl lined with plastic wrap as a substitute. The shape will still resemble a brain, especially once decorated with the white chocolate squiggles and red berry sauce drizzle.
- → How do I store leftovers?
-
Keep refrigerated in an airtight container for up to 3-4 days. The white chocolate decoration may soften slightly but the texture and flavor remain excellent.
- → Can I use frozen strawberries instead of fresh?
-
Frozen strawberries work well for the puree layer. Thaw completely before blending, and you may need to reduce the added sugar since frozen berries can be sweeter.
- → What if I don't have gelatin?
-
Agar-agar makes an excellent vegetarian substitute. Use approximately 1 teaspoon of agar powder dissolved in hot water, following package instructions for proper blooming.
- → Can I make the chocolate decoration ahead?
-
Absolutely! Pipe the white chocolate squiggles onto parchment paper and chill until firm. Store between layers of wax paper in the refrigerator until ready to use.
